Changing brake fluid is one of the most important — and most overlooked — items of vehicle maintenance. Brake fluid absorbs moisture from the air over time, which lowers its boiling point and corrodes internal brake components. A complete flush every two years restores the full safety margin of your braking system. This guide explains exactly how to change brake fluid step by step, whether you are doing it yourself with hand tools or want to understand what a workshop does on your behalf.
Brakes are a safety-critical system. This guide is for general education. If you are not confident performing this work, if your vehicle requires a diagnostic scan tool to bleed the ABS, or if the brake pedal remains soft after bleeding, stop and have the work completed by a qualified technician. A mistake in brake maintenance can result in brake failure.
Why changing brake fluid matters
Glycol-ether brake fluid — the chemistry used in DOT 3, DOT 4, DOT 4 LV and DOT 5.1 — is hygroscopic, meaning it actively absorbs moisture from the atmosphere. Even in a sealed brake system, moisture diffuses through reservoir caps and rubber hoses over time. Two problems result:
- Lower boiling point. Fresh DOT 4 has a dry boiling point around 250 °C. After two years of moisture absorption, the wet boiling point can fall to 155 °C or below. Under sustained heavy braking — a mountain descent, repeated stops, or track use — the fluid can boil, producing vapor in the lines that compresses easily. The result is a soft pedal, loss of braking assist, and dramatically increased stopping distance. This phenomenon is called brake fade or vapor lock.
- Internal corrosion. The absorbed water corrodes steel brake lines, caliper pistons, the master cylinder bore, and — most expensively — the ABS modulator valve block. Corroded ABS components are a common and costly failure on vehicles whose fluid was never changed.
To understand the boiling-point chemistry in detail, see our guide on brake fluid boiling point: dry vs wet.
How often should you change brake fluid?
The general recommendation across most vehicle manufacturers:
| Operating condition | Recommended change interval |
|---|---|
| Standard use (most vehicles) | Every 2 years or 40,000 km / 24,000 miles |
| Humid / tropical climate | Annually — moisture absorption is faster |
| Mountain driving / towing | Annually — thermal cycling stresses the fluid |
| Track / performance use | Before every event |
| Measured water content ≥ 3% | Replace immediately, regardless of age |
Workshops use brake fluid moisture test strips or electronic testers to measure the water content directly. The 3% threshold is the standard trigger for replacement, since at that level the wet boiling point has typically fallen below the safe margin for the grade.
Which brake fluid should you use?
The single most important rule: use the grade specified on your vehicle's brake fluid reservoir cap or in the owner's manual. The cap on the master cylinder is marked with the required DOT grade — typically "DOT 3", "DOT 4", "DOT 4 LV" or "DOT 5.1".
The compatibility rules when selecting fluid:
- You may use a higher glycol-ether grade than specified. For example, DOT 4 in a DOT 3 system, or DOT 5.1 in a DOT 4 system. This is a safe upgrade that adds thermal margin.
- Never use a lower grade than specified. Putting DOT 3 in a system designed for DOT 4 reduces your safety margin.
- Never use silicone DOT 5 unless your vehicle was specifically designed for it (some older Harley-Davidson motorcycles and military vehicles). DOT 5 is chemically incompatible with the glycol-ether fluids in nearly all passenger vehicles — see our DOT 5 vs DOT 5.1 guide for why this matters.
If you are unsure which grade your vehicle uses or want to understand the differences, our complete guide to brake fluid types walks through all seven grades.
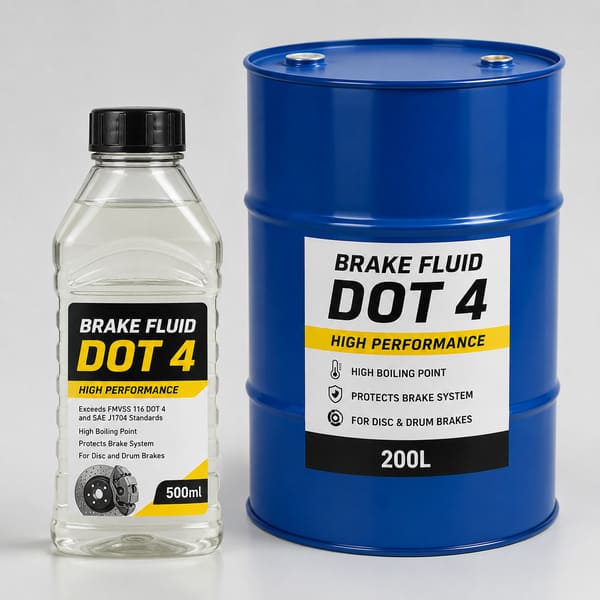
The universal modern brake fluid for the majority of passenger cars — 250 °C dry ERBP, FMVSS 116 certified. Available bulk, drum and retail packaging for workshops and distributors. View product details →
Tools and materials you'll need
Because brake fluid is hygroscopic, an opened bottle starts absorbing moisture immediately. Always use fluid from a freshly opened, sealed container — never a part-used bottle that has been sitting open on a shelf. Buy the smallest sealed size that covers the job.
The four bleeding methods explained
There are four common methods of pushing old fluid out and new fluid through the system. All achieve the same result; the differences are in equipment and whether you need a helper.
1. Gravity bleeding
The simplest method. Open the bleeder valve and let gravity slowly draw fluid down through the system. No helper or special tools required, but it is slow (allow extra time) and works best as a top-up technique rather than a full flush.
2. Two-person (pump-and-hold) bleeding
The classic method. One person pumps and holds the brake pedal while the other opens and closes the bleeder valve. Reliable and requires no special equipment beyond a wrench and tube — but you need a second person.
3. Vacuum bleeding
A hand-operated vacuum pump draws fluid out through the bleeder valve. A one-person method that is fast and effective, though air can sometimes be drawn past the bleeder threads, giving a false impression of bubbles.
4. Pressure bleeding
A pressure bleeder pushes fluid into the reservoir under pressure, forcing it through the system to each bleeder. This is the professional workshop standard — fast, thorough, and a one-person job — but requires a pressure bleeder unit.
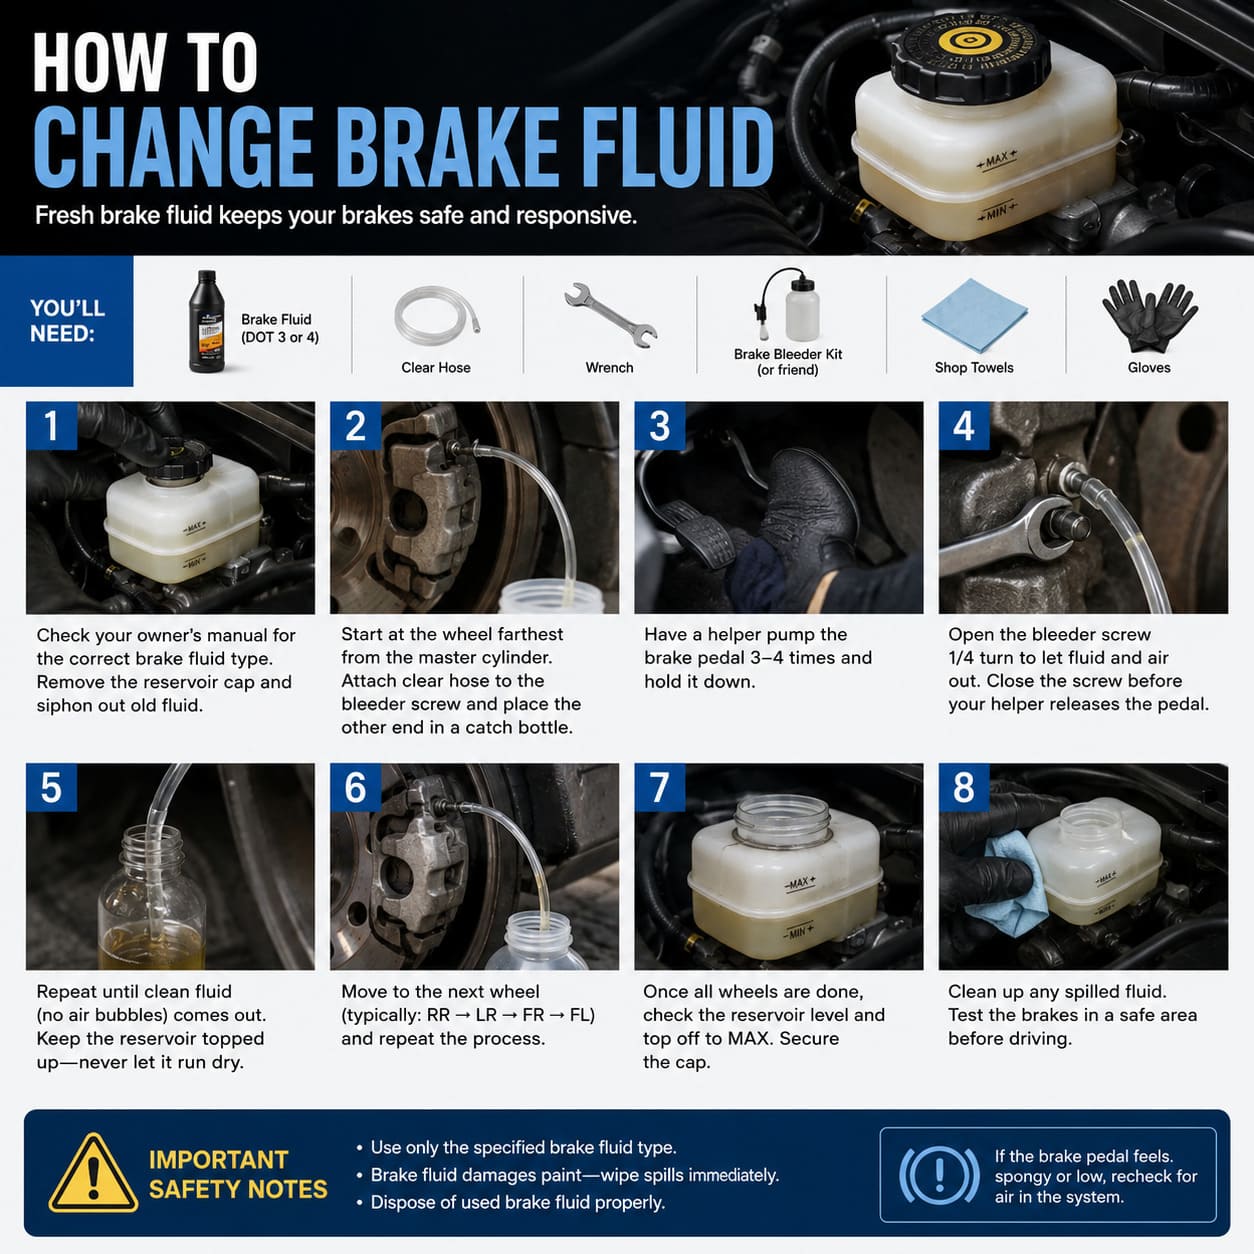
Step-by-step: how to change brake fluid
The procedure below uses the two-person method as the baseline because it requires no special equipment. The same principles apply to all methods.
Check the reservoir cap and owner's manual for the specified DOT grade, and buy a fresh sealed bottle. Confirm the size of the bleeder valves on your calipers so you have the right wrench. Have everything laid out before you begin.
Park on level ground, engage the parking brake, and chock the wheels. Loosen the wheel nuts slightly before lifting. Raise the vehicle and support it securely on axle stands — never work under a vehicle held only by a jack. Remove the wheels to access the bleeder valves.
Open the master cylinder reservoir cap. Use a turkey baster or syringe to draw out as much of the old, dark fluid as possible. Wipe out any sediment from the bottom of the reservoir. Refill to the MAX line with fresh fluid.
- Do not let the reservoir run completely dry at any point — this introduces air into the master cylinder, which is difficult to bleed out.
Starting at the wheel furthest from the master cylinder, attach the clear tube to the bleeder valve and run it into the catch bottle. Then:
- Helper pumps the brake pedal several times, then holds it down.
- Open the bleeder valve a quarter-turn. Fluid (and any air) flows out into the tube. The pedal will sink.
- Close the bleeder valve before the helper releases the pedal.
- Repeat until clean, bubble-free new fluid flows through the tube.
- Top up the reservoir after every few cycles so it never runs dry.
Move to the next wheel in sequence (see the next section) and repeat.
When all four wheels are done, top up the reservoir to the MAX line and refit the cap. Refit the wheels and lower the vehicle. With the engine off, press the brake pedal several times — it should become firm and stay firm. Then, in a safe, traffic-free area, test the brakes at low speed before driving normally.
- If the pedal feels soft or spongy, there is still air in the system. Re-bleed before driving at normal speed.
A firm brake pedal is the confirmation that the system is properly bled. If the pedal remains soft or sinks to the floor after repeated bleeding, do not drive the vehicle. Air is trapped somewhere in the system, or there is a deeper fault. Have it inspected by a professional.
The correct wheel bleeding sequence
Brake fluid should be bled starting from the wheel furthest from the master cylinder and working toward the closest. This ensures the longest lines are purged of old fluid and air first. For most vehicles the sequence is:
- Rear passenger side (furthest)
- Rear driver side
- Front passenger side
- Front driver side (closest)
However, some vehicles specify a different sequence — particularly those with diagonal-split brake circuits or specific ABS layouts. Always check your vehicle's service manual for the manufacturer-specified bleeding order, as following the wrong sequence can leave air trapped in the system.
Common mistakes to avoid
- Letting the reservoir run dry. The single most common error. Air drawn into the master cylinder is very difficult to remove. Top up constantly.
- Reusing old fluid. Never pour caught fluid back into the system. The old fluid is contaminated and moisture-laden.
- Using a part-opened bottle. Brake fluid absorbs moisture the moment the seal is broken. Use fresh, sealed fluid.
- Spilling fluid on paint. Glycol-ether brake fluid strips automotive paint on contact. Wipe spills immediately and rinse with water.
- Over-tightening bleeder valves. They are small and easily snapped or stripped. Tighten just enough to seal.
- Mixing incompatible fluids. Never add silicone DOT 5 to a glycol-ether system. Read our DOT 5 vs DOT 5.1 guide.
- Skipping the road test. Always confirm firm pedal feel and safe low-speed braking before normal driving.
A note on ABS and modern vehicles
Modern vehicles with Anti-lock Braking Systems (ABS), Electronic Stability Programs (ESP), and electro-hydraulic brake-by-wire systems often require a diagnostic scan tool to fully bleed the ABS modulator. The scan tool commands the ABS pump to cycle its internal valves, releasing any air trapped inside the modulator block that conventional bleeding cannot reach.
If your vehicle has ABS and you do not have access to the appropriate scan tool, you can usually still perform a standard fluid change at the calipers — but a complete ABS bleed should be done by a workshop with the correct equipment. This is especially important for vehicles using low-viscosity fluids such as DOT 4 LV or HZY6, which are specified precisely because of the high-frequency valve cycling in these systems.
If you operate a workshop, fleet, or distribution business and need brake fluid in bulk, drum, or private-label packaging, Sinolook manufactures the full glycol-ether range. See the brake fluid product portfolio or contact our team for trade pricing.
Frequently asked questions
How often should you change brake fluid?
Most vehicle manufacturers recommend changing brake fluid every 2 years or 40,000 km / 24,000 miles, whichever comes first. In humid tropical climates, mountain driving, or track use, more frequent changes are warranted. The general workshop rule is to replace brake fluid when its water content reaches 3% or above, regardless of calendar time.
Can I change brake fluid myself?
Yes, changing brake fluid is a common DIY task for those with basic mechanical skills and the right tools. However, brakes are safety-critical. If you are unsure about any step, have an ABS-equipped vehicle that requires a scan tool to bleed, or notice any abnormality such as a spongy pedal that does not improve, have the work done by a qualified technician.
What happens if you don't change brake fluid?
Brake fluid absorbs moisture over time, which lowers its boiling point. Old, moisture-laden fluid can vapor-lock under heavy braking — producing a soft or non-responsive pedal and dramatically increasing stopping distance. Moisture also corrodes internal brake components such as ABS modulators, calipers and the master cylinder, leading to expensive repairs.
Which brake fluid should I use when changing it?
Always use the grade specified on the brake fluid reservoir cap or in the owner's manual — typically DOT 3, DOT 4 or DOT 4 LV. You can use a higher glycol-ether grade than specified, but never a lower grade, and never silicone DOT 5 unless the vehicle was specifically designed for it.
How long does it take to change brake fluid?
A complete brake fluid flush typically takes 60 to 90 minutes for a DIY job with hand tools, or 30 to 45 minutes in a workshop with a pressure bleeder. The time depends on the bleeding method used and whether the vehicle requires a diagnostic scan tool to cycle the ABS pump.
Do I need to bleed the brakes after changing the fluid?
Bleeding is the process of changing the fluid — pushing old fluid out and new fluid through each wheel removes air at the same time. The key confirmation is a firm brake pedal at the end. If the pedal is soft, air remains in the system and you must continue bleeding before driving.
Choosing the right fluid for the job
Whichever brake fluid grade your vehicle requires, Sinolook manufactures the complete glycol-ether range at our IATF 16949:2016 certified plant in Nan'an, Fujian, China — independently tested at ABIC Testing Laboratories, Inc. in the United States, and meeting FMVSS 116, ISO 4925 and SAE J1703:
- Sinolook DOT 3 — for older vehicles, motorcycles and clutch systems
- Sinolook DOT 4 — the universal modern grade
- Sinolook DOT 4 LV — low-viscosity for modern ABS / ESP systems
- Sinolook DOT 5.1 — highest standard glycol grade for performance use
- Sinolook HZY6 — premium grade for EVs and hybrids
Registration of compliant brake fluids in the United States is verifiable through the AMECA database — Sinolook DOT 4 carries notification #221045. For the full range, see the brake fluid product portfolio.